
I'm going to give a run through of the editing process I used to produce the final version of a photograph I took while at the National Cancer Research Institute - in the Angel Building in London.
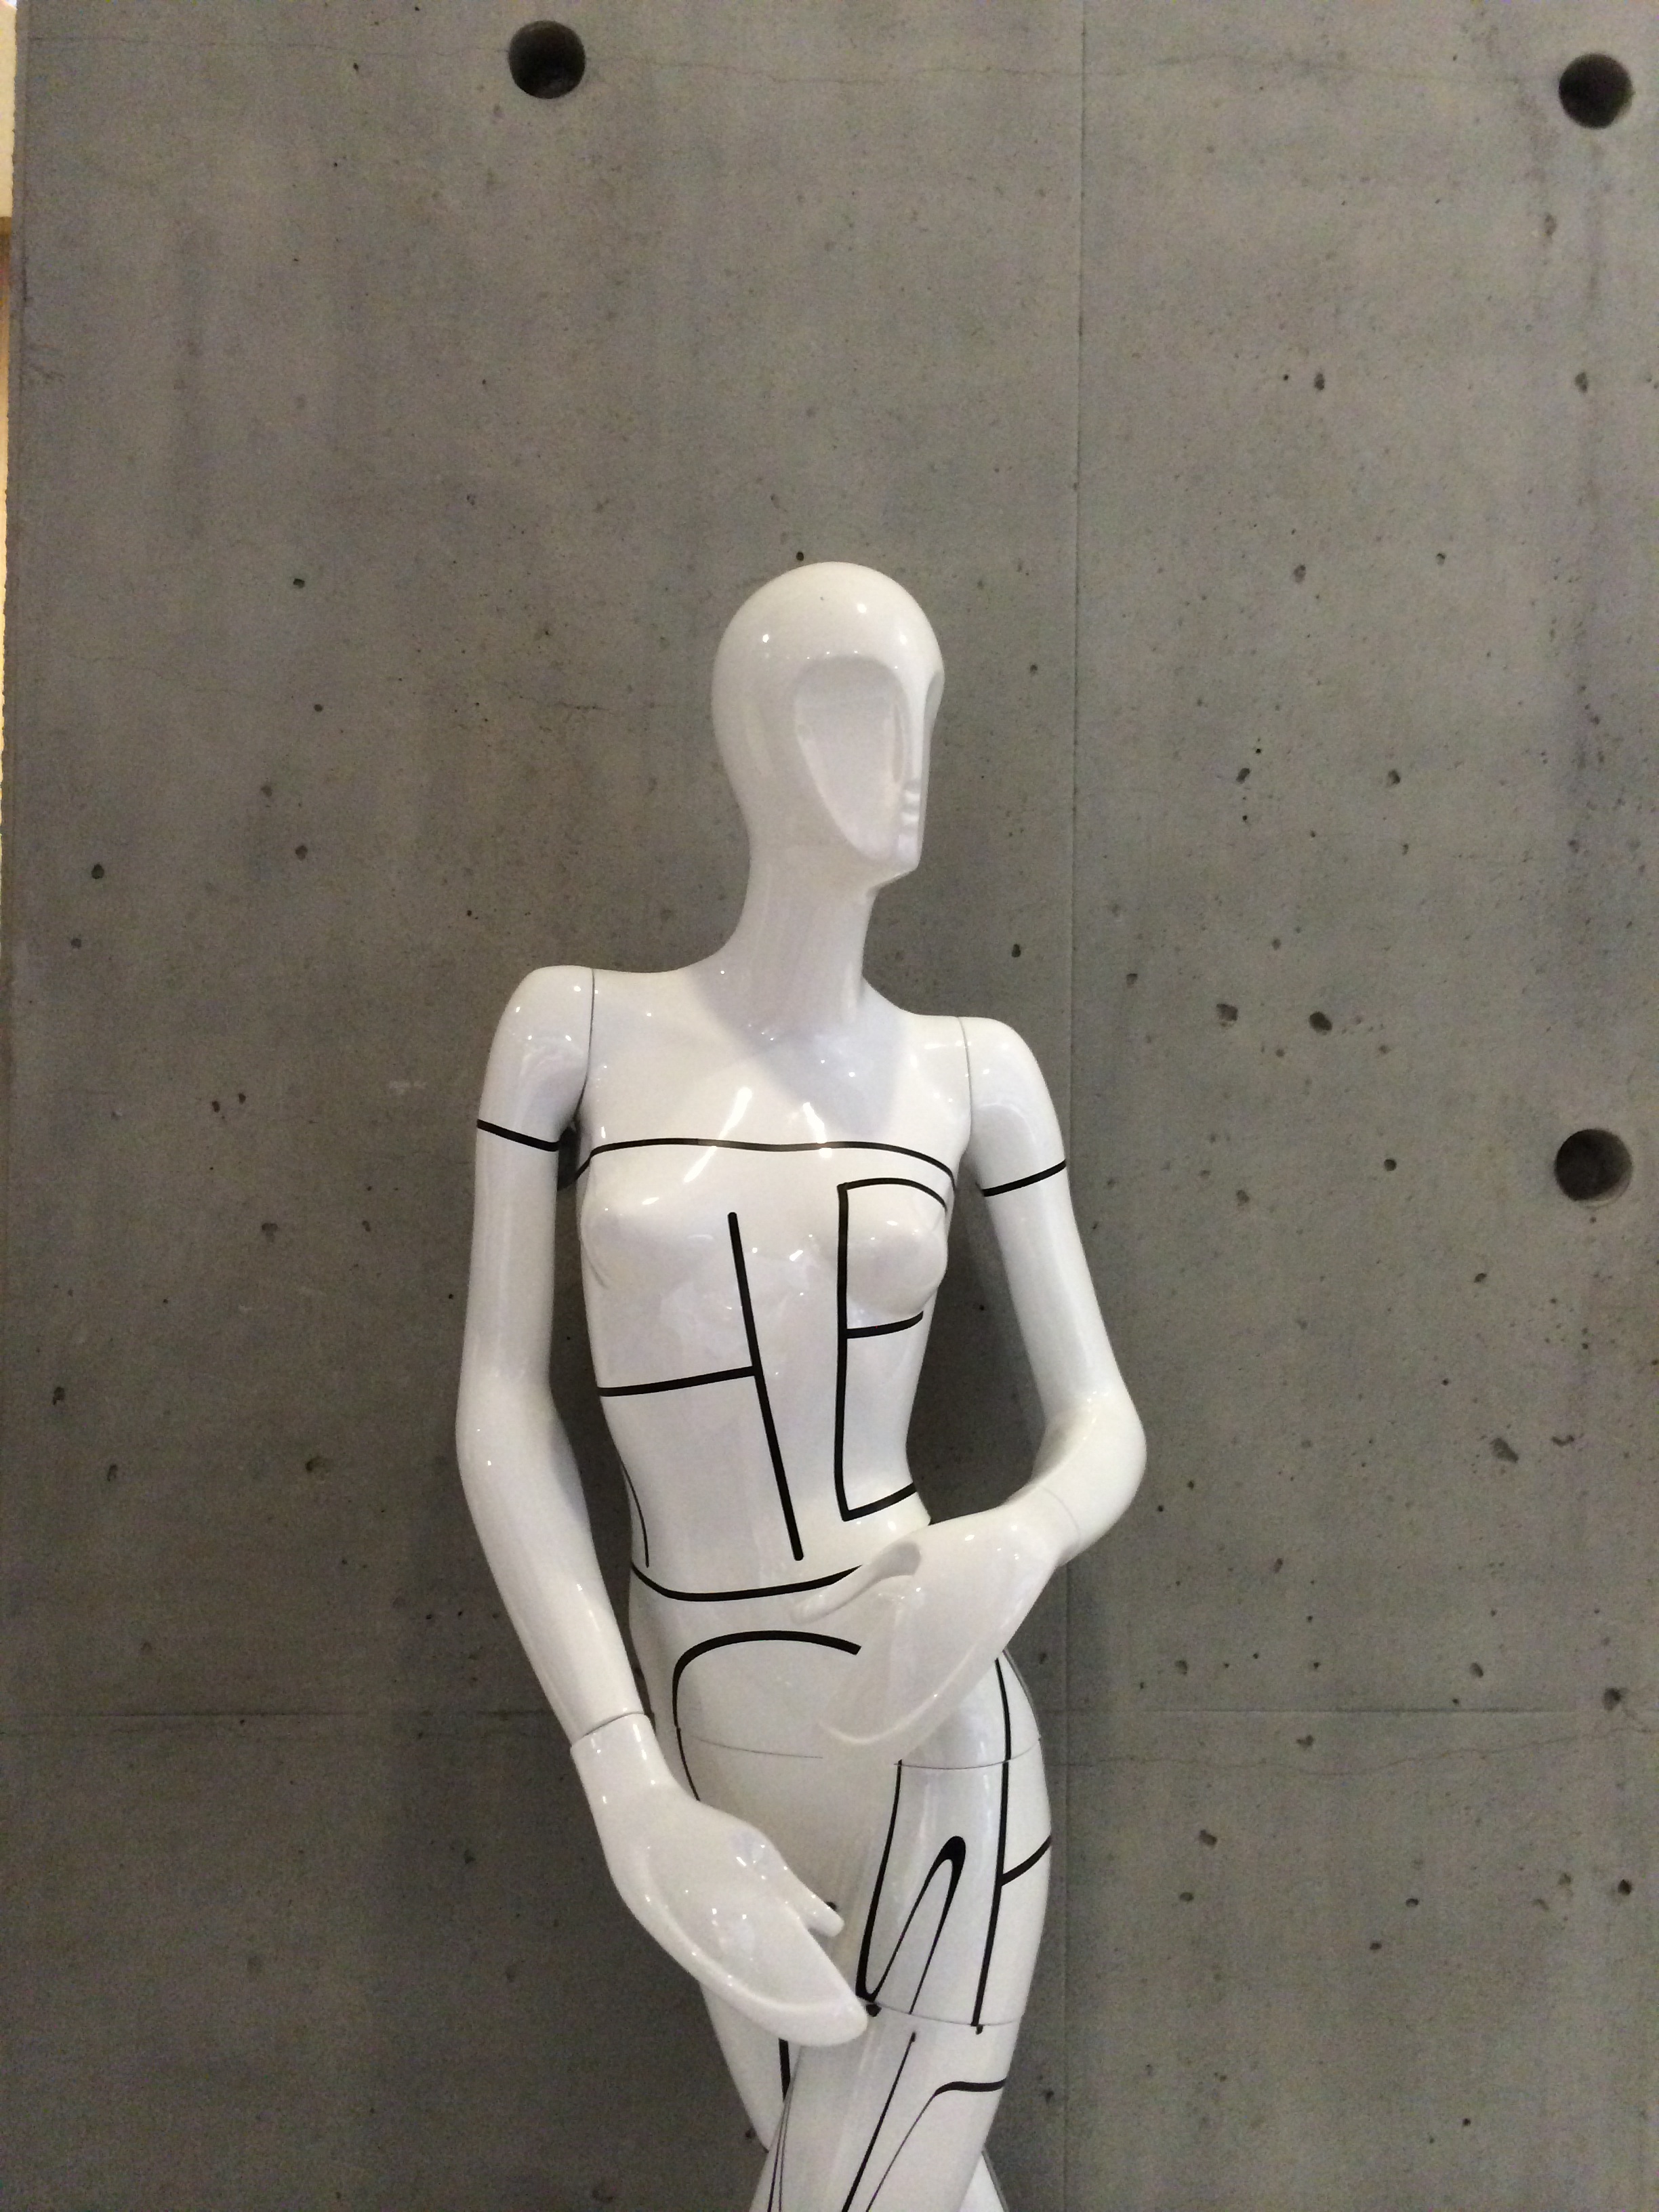
Fig 1.
Fig 1 shows the original, unedited photo. It was taken with PureShot on my iPhone 5S.
Initial thoughts: I liked the contrast of smooth mannequin against the textured cement background, but there were a couple of things that I was disappointed with.
The first was the digital grain - the room was fairly dark and the shot came out at ISO 320. This showed up as a lack of edge sharpness around the figure and in the cement texture.
The second was the angle I took the shot at. I had held the camera at near head height and angled it downwards slightly. This resulted in the line between the cement blocks being non-vertical. I tried to rectified this by using the app Perspective Correct, but this elongated the mannequin to much and moved the hole at the right of the shot, which I felt added some balance, out of the picture.

Fig 2
Fig 2 - My first step towards the final result, was to import into VSCOcam and crop square. I applied the preset B5, but reduced the strength to +9. I then increased the contrast to +1 and sharpness to +1.

Fig 3.
Fig 3 - I opened the VSCOcam result in Snapseed and selectively adjusted the image darkening the left hand side of the image.

Fig 4.
Fig 4 - Next, I imported the Snapseed result into Mextures. Unfortunately, I did this part of the process by experimenting and can't remember exactly what I did. There were three layers applied in various strengths, different rotations and blending modes. I definitely used the Painterly texture.
Fig 5.
Fig 5 - I imported the Mexture edit and the VSCO edit into PhotoShop Touch. On the VSCO edit layer, I cut out the figure (see Fig 6) and used a 100% normal blend to put it back in to create the final image.

Fig 6.